
API & Integrations
Generate API keys, explore the REST API, and set up integrations.
Generating API Keys
To interact with RivetChain programmatically, you need an API key. Each company has one API key, managed from the Integrations tab in your company settings. Only the company owner can generate it. The key gives full access to your company's data through the API, so keep it on your server.
- 1
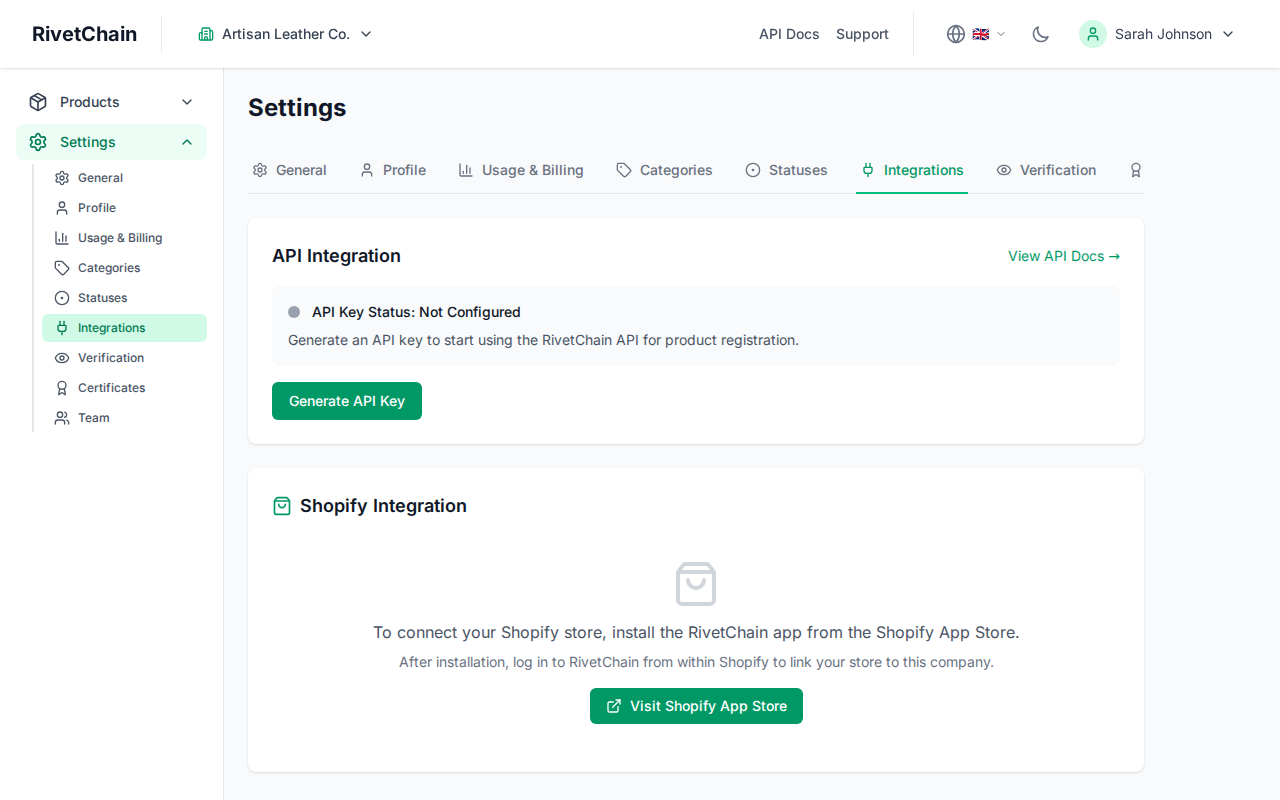
Open the Integrations tab
Navigate to Settings and select the Integrations tab. The API Integration section shows whether your company already has an active API key.
- 2
Click "Generate API Key"
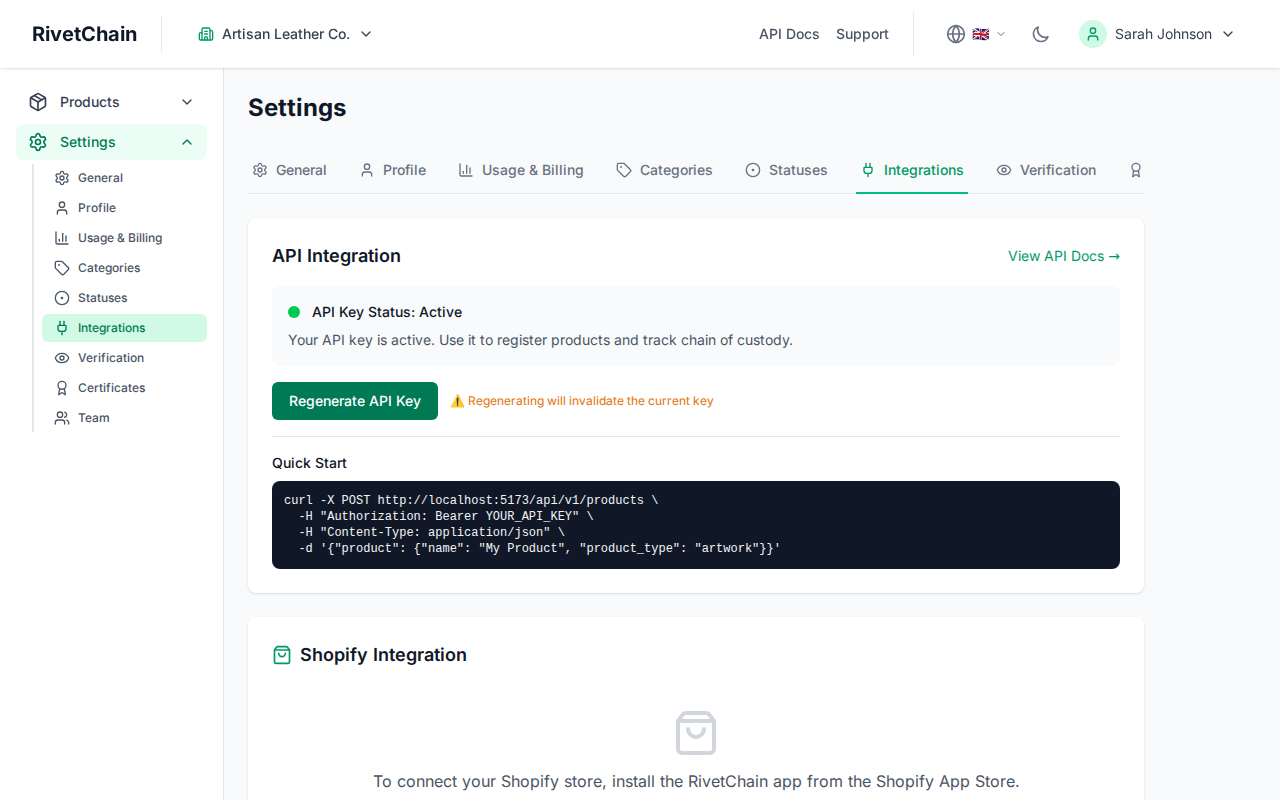
Click "Generate API Key". If your company already has a key, the button reads "Regenerate API Key" and creating a new key immediately stops the previous one from working.
- 3
Copy your API key
Your new API key is shown only once, right after you generate it. Copy it immediately and store it in a secure location. For security reasons, we keep only a fingerprint of the key and cannot show it again.
REST API Overview
The RivetChain REST API allows you to create products, record events, and verify product authenticity from your own applications. All API requests require an API key passed in the Authorization header as a Bearer token.
The API provides endpoints for the following operations:
- Products - Create, list, retrieve and update products along with their event history.
- Custody events - Record chain-of-custody events, such as a transfer or an inspection, against a product.
- Verification - Run a verification check on a product by its UUID. It always checks the integrity of the database record and, for products where blockchain anchoring is turned on, also returns the blockchain and IPFS proof.
API Documentation
RivetChain provides interactive API documentation that lets you explore endpoints, view request and response formats, and test calls directly from your browser. Access the documentation from the API Docs link in the top navigation of your dashboard.
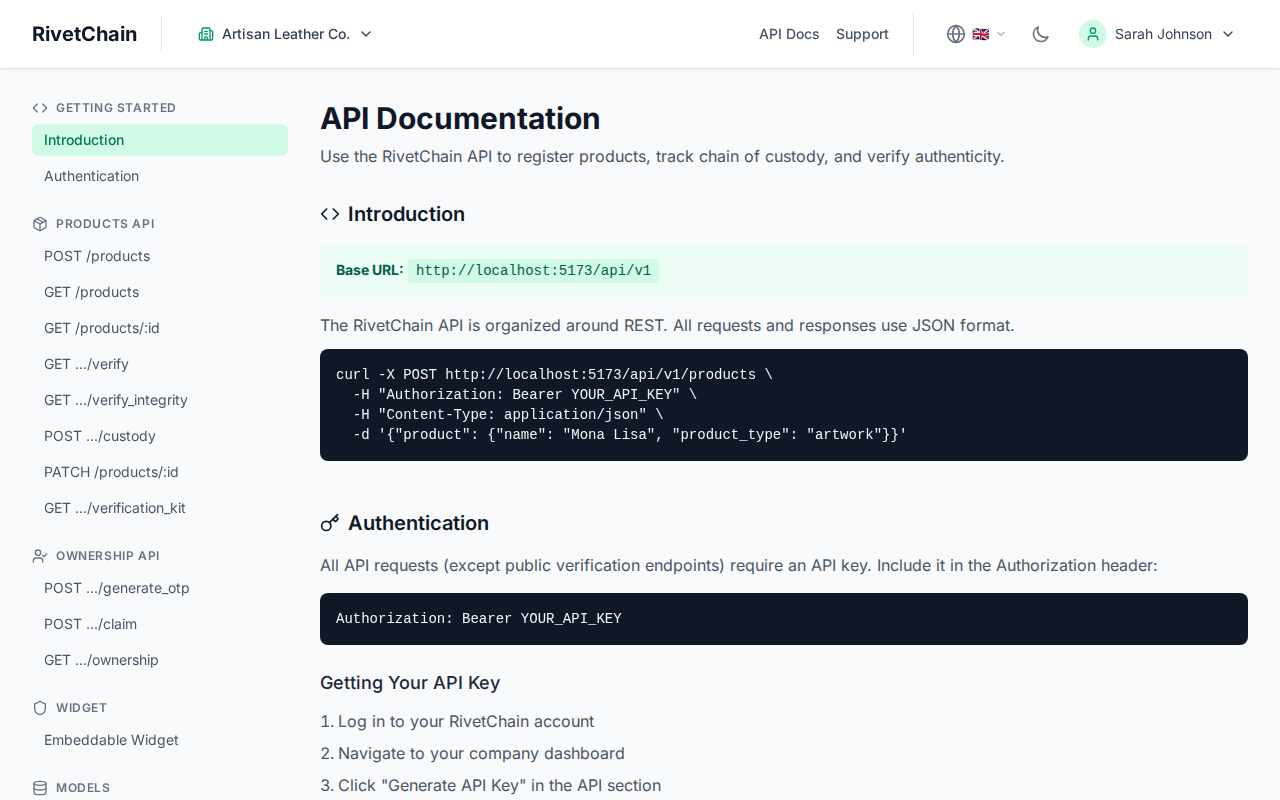
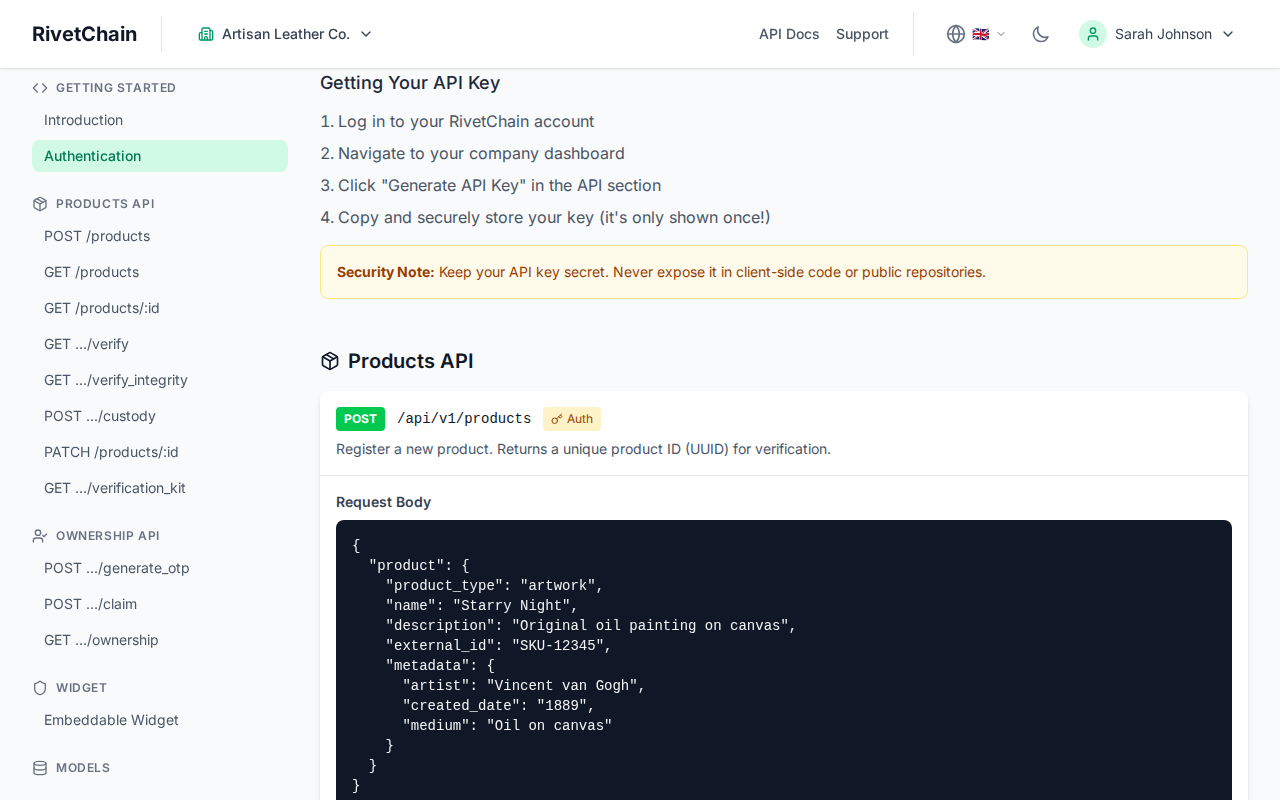
Each endpoint includes a description, required parameters, example requests, and sample responses. You can expand any endpoint to see its full specification.
Shopify Integration
If you run a Shopify store, you can connect it to RivetChain to automatically create a product passport for every item ordered and a certificate of authenticity when the order is fulfilled. Blockchain anchoring is optional and off by default.
- 1
Install from Shopify App Store
Visit the Shopify App Store and install the VeriFined app. The first time you open it from your Shopify admin, a workspace is created for your store automatically. If you already have a web account, use "Connect an existing account" on the app's dashboard to move the store onto it.
- 2
Authorize the connection
Review the permissions requested by the app and approve. RivetChain needs access to your products and orders to create verified records automatically.
- 3
Automatic sync
Once connected, your Shopify store status appears in the Integrations tab of your RivetChain settings. A product passport is created in Draft for each item when an order is placed, and it becomes Active when the order is fulfilled.
Embeddable Verification Widget
RivetChain provides an embeddable widget that you can add to your own website, allowing customers to verify a product without leaving your site. The widget shows the verification result and product history, plus the blockchain proof when the product is anchored.
Each product has its own widget. Open the product in your dashboard and go to its Embed tab to configure the widget (full or badge mode, light or dark theme, size) and copy the snippet. See the Embeddable Verification Widget article for details.
For embedding a certificate search box, see the Search Widget article.